Form Calculations
RSForm!Pro allows you to perform simple calculations within your custom form. To better understand how this works, we will provide an example. If this is not enough, you can also check the Video Tutorial.
Note: The example form presented in this article can be simply added to your Joomla! installation through the "Create a new form wizard" by selecting the "Calculation Form".
The calculation also works with calendars or date time picker elements. This topic is described below.
Let's assume you want a mobile personalization form, which based on the user choices, will result in a final price.
What are we going to use for the calculation:
- radio group field (used to select different mobile storages)
- another radio group field (for the mobile color)
- dropdown field (to select the quantity)
How to setup these above form fields:
First radio group
Besides the standard setup of a radio group, we will specify the following items:
- 16GB|16GB - $399[p399][c]
- 32GB|32GB - $499[p499]
- 64GB|64GB - $599[p599]
Second radio group
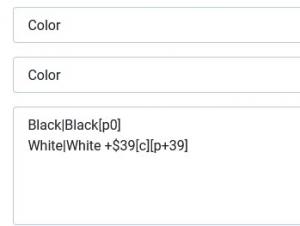
The second radio group will have these items:
- Black|Black[p0]
- White|White +$39[c][p39]
Explanation:
- The pipeline "|" symbol is used to split the value into "value | label". Only the right part after the pipeline will be shown in the frontend area, as the left part before the pipeline will be the actual value of the selection.
- To specify a price for a selection you will have to use the [p] syntax with the numeric value inside the square brackets, as you can see above.
- The [c] syntax is used to make that item pre-selected when the form shows in the frontend.
Note: If you are to use textbox or hidden field, you will only need to add the actual numeric value, without the [p] syntax. You can also use two or more Textbox fields in your equation.
The dropdown
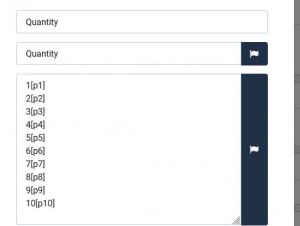
Besides the standard setup of a dropdown, we will specify these items:
- 1[p1]
- 2[p2]
- 3[p3]
- 4[p4]
- 5[p5]
- 6[p6]
- 7[p7]
- 8[p8]
- 9[p9]
- 10[p10]
Adding the calculation equation:
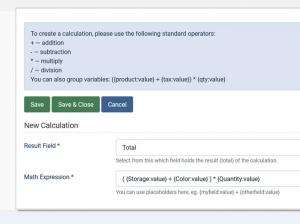
Besides the form fields specified above, we will also need a textbox field in our form for the total. After we have added this field, we will head to Properties(backend > Components > RSForm!Pro > Manage Forms > your form > Properties) and select Calculations from the left panel.
The fields we have used in our form have their own specific placeholders, these placeholders can be used in our equation. You can view what placeholders you can use by simply clicking on the input field within this area.
Standard operators can be used and the variables can be grouped in brackets:
- + addition
- - subtraction
- * multiply
- / division
Example equation based on our scenario: ( {Storage:value} + {Color:value} ) * {Quantity:value}
Notice that the "storage" and the "color" are grouped together and then multiplied with the quantity.
The calculation is added by selecting the total field, adding the equation and clicking on the plus "+" icon(as seen in the right picture). Afterwards simply Save and test this in the frontend area.
Important: The calculation equations can only be used with input fields.
Calculations Configuration - optional
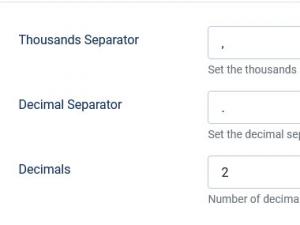
You can customize the calculation even further by specifying the thousand separator, decimal separator and the number of decimals. These are found in the backend > Components > RSForm!Pro > Configuration > Calculations, as seen in the left picture.
Calendar or Date Time Picker Calculations
You can calculate exactly how many minutes, hours or days have passed between two calendars or date time picker elements. Doing so, will require that you utilise the following specialized functions, being added part of the calculation equation:
- for Days:
RSFormPro.Calculations.toDays({second_calendar_name:value} - {first_calendar_name:value}) - for Hours:
RSFormPro.Calculations.toHours({second_calendar_name:value} - {first_calendar_name:value}) - for Minutes:
RSFormPro.Calculations.toMinutes({second_calendar_name:value} - {first_calendar_name:value})
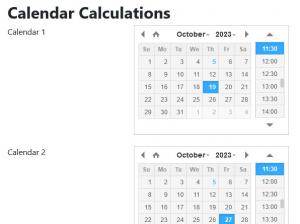
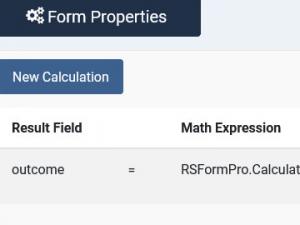
second_calendar_name and first_calendar_name will be the exact names of your calendar or date time picker elements (case sensitive). The following images show an example using two Date Time Picker elements.
- using calendar placeholders within the calculation equation will return Unix timestamp (basically the number of seconds that have passed since 1 January 1970 until the selected date or date/time)
- these functions are used to automatically convert the remaining timestamp into Hours respectively Days
- using anything else besides subtraction within the functions parameters will not be of any help - the functions are provided to calculate days/hours differences
- the functions calculated outcome will always be rounded up - JavaScript Math.round();
85 persons found this article helpful.


![A radio group items using the pipeline "|", [p] and [c] syntax.](https://cdn.rsjoomla.com/components/com_rsmediagallery/assets/gallery/300x224/7ff2e43f570f6c9668f4f5e4c0bedf99.jpg)
