Posts
The Posts tab is the place where all your posted articles can be found. This tab is accessible via the following path: Components > RSBlog! > Posts. Here you can add, edit and set up advanced post settings.
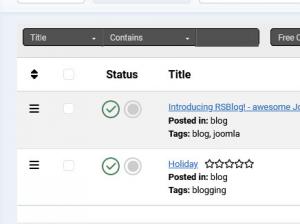
The initial view displays a listing of your current posts (published / unpublished, archived / unarchived), as it can be seen below. You will notice that the view tries to retain the look from the Joomla! content area as possible.
On the top right corner, among the usual buttons like New, Edit, Copy, Delete, Publish and Unpublish, (the name pretty much explains the functionality) you will also find the following buttons:
Archive / Unarchive
Archiving a blog post will exclude it from any blog posts listings that you might have configured on your site (if not specified otherwise).
Stick / Unstick
As in forums, you can have posts that need a special attention. Via the sticky feature RSBlog! allows you to add a blog post that will always be listed on the top of your blog post listings, thus increasing its visibility (in the below picture the "Introducing RSBlog!..." is marked as sticky).
Reporting Posts
Readers can also report posts, this functionality can be enabled in the component's configuration area. Reports can then be reviewed here, in the posts listing, by clicking on the number of reviews associated with each post in the Reports column.
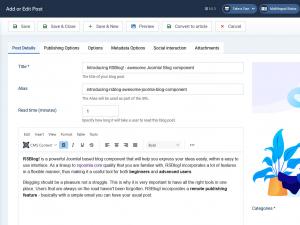
Clicking on the New or Edit button will reveal the following screen.
Here you can set the following:
Post Details
- Title
- Alias
- Read Time in minutes (Specify how long it will take a user to read this blog post)
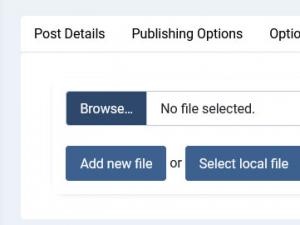
- Blogpost image that will be displayed above the post's text (Upload an image or Select one locally)
- The actual text/HTML
- Post categories (choose from an existing list or create new one)
- Adjust or add post tags
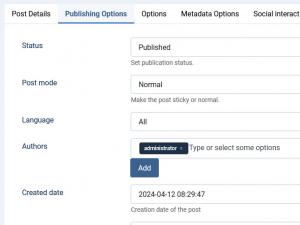
Publishing Options
- Status: Published, Draft or Archived
- Post mode: Sticky or Normal
- Language: Select the post language visibility. This option works only on multilingual websites. Details on how to create a Multilingual site in Joomla! can be found here.
- Authors: Select the Author / Authors for the blog post
- Created date
- Publishing period - with 2 available options, Start Publishing and Finish Publishing dates
- Modified Date - the date and time that the post was last modified.
- Hits - shows you how many times this article was viewed.
- Password Protection - add a password to protect the content in this post. Your viewers will have to enter the password to see the content.
- Accept trackbacks and pingbacks
- Allow Comments option.
Setting a publishing period (start and end date) will basically allow a blog post to be visible only in the specified period. At its end this will simply be excluded from the posts listing (it will not become unpublished or archived).
Accepting pingbacks or trackbacks will implies that you accept the notification send from other blogs (that have linked to your post). This is a good way to keep track on who linked to your post or how many linked to your post. Basically the pingback and trackbacks achieve the same result just that different methods are used.
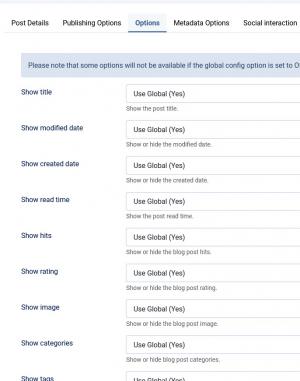
Options
- Show title
- Show modified date
- Show created date
- Show read time
- Show hits
- Show rating
- Show image
- Show categories
- Show tags
- Show attachments
- Show social links
- Show author info
- Show home icon
- Show print icon
- Show PDF icon
- Show email to icon
- Show subscribe icon
- Show report icon
- Enable schema.org integration
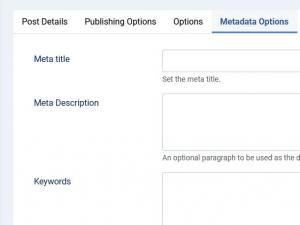
Metadata Options
- Meta Title - Set the meta title
- Meta Description - An optional paragraph to be used as the description of the page in the HTML output. This will generally display in the results of search engines.
- Meta Keywords - An optional comma-separated list of keywords and/or phrases to be used in the HTML output.
- Robots - Choose the robots instructions from: Global / Index, Follow / No Index, follow / Index, no follow / No Index, no follow.
- Author - the meta content author
- Google Profile URL - provide the URL to your Google Profile
- Canonical URL - set the post's canonical URL
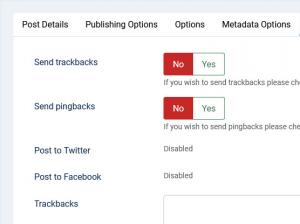
Social Interaction
- Send trackback / pingbacks - send pingbacks and trackbacks to notify other blogs that you have linked to their blog. Note that in order for pingbacks to work please enable "Web Services" from Global Configuration.
- Post to Twitter - In order for this to work you will have to properly configure your twitter settings in the Configuration tab.
- Post to Facebook - In order for this to work you will have to properly configure your facebook settings in the Configuration tab.
- Trackbacks - Send trackbacks to one or more URLs.
Add each trackback on a separate row.
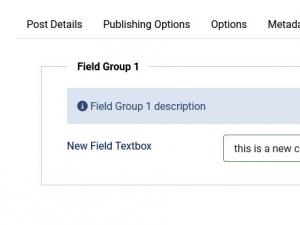
Custom Fields
This area will display the selected Field Groups configured for the blog post's category.
Attachments
You can can also select blog post images from your already existing files from the images folder, you are no longer restricted to uploading the blog post image on your server. After uploading/selecting the file, you will be able to either Edit, Delete or Download it.
You can convert posts to a Joomla! article . This way you will be able to make the posts from RSBlog! usable in any other 3rd Party Components or Plugins.
3 persons found this article helpful.

