Custom RSContact! Parameters
In this article we will explain RSContact!'s custom configuration parameters. They are grouped into 3 tabs:
Fields
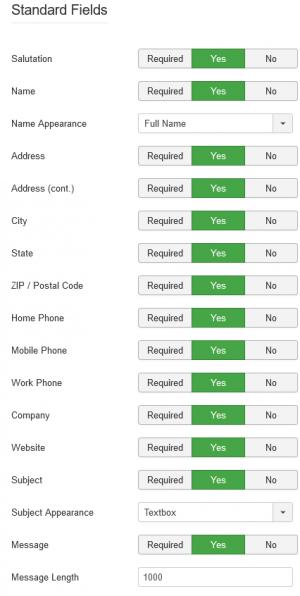
The form fields that will be displayed in the frontend can be set up in this area:
Standard Fields
- Salutation: Required, Yes / No - lets the user choose his / her salutation - Mr. / Ms. / Mrs. / Dr. / Prof.
- Name: The name of the form's submitter
- Name Appearance: Full Name / First and Last Name - choose whether a single Full Name field is displayed or 2 separate First Name and Last Name fields.
- Address: The form submitter's address
- Address (cont.): The form submitter's address continued
- City: The form submitter's city
- State: The form submitter's state of residence
- ZIP / Postal Code: The form submitter's ZIP / postal code
- Home Phone: The form submitter's home phone
- Mobile Phone: The form submitter's mobile phone
- Work Phone: The form submitter's work phone
- Company: The form submitter's employing company
- Website: The form submitter's website
- Subject: The submission's subject
- Subject Appearance: Textbox / Textarea / Dropdown / Radio / Checkbox - choose a type for the Subject field
- Pre-defined Subjects: Specify any number of predefined subjects, each on a new line
- Message: The form submitter's message
- Message Length: set a maximum length (in characters) for the Message field
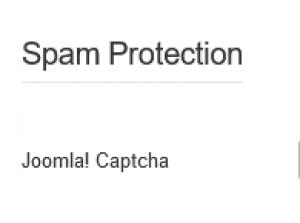
Spam Protection
- Joomla! Captcha: Enable / disable the default Joomla! antispam method enabled in Global Configuration
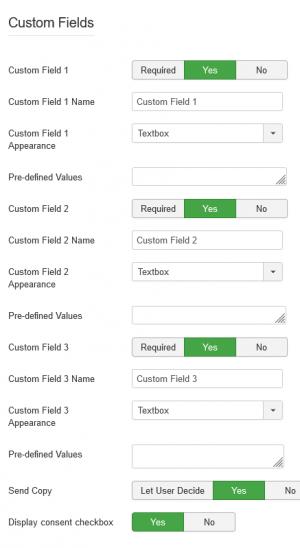
Custom Fields
These are 3 fields that can be customized in order to include any information required for your scenario.
- Custom Field 1: Required / Yes / No
- Custom Field 1 Name: the first custom field's caption
- Custom Field 1 Appearance: choose the field's type - Textbox / Textarea / Dropdown / Radio / Checkbox
- Pre-defined Values: Available for Dropdown / Radio / Checkbox types - provide the selectable values, each on a new line
- Custom Field 2: Required / Yes / No
- Custom Field 2 Name: the second custom field's caption
- Custom Field 2 Appearance: choose the field's type - Textbox / Textarea / Dropdown / Radio / Checkbox
- Pre-defined Values: Available for Dropdown / Radio / Checkbox types - provide the selectable values, each on a new line
- Custom Field 3: Required / Yes / No
- Custom Field 3 Name: the third custom field's caption
- Custom Field 3 Appearance: choose the field's type - Textbox / Textarea / Dropdown / Radio / Checkbox
- Pre-defined Values: Available for Dropdown / Radio / Checkbox types - provide the selectable values, each on a new line
- Send Copy: You can set this to Yes in order to always send a copy of the submission to the user. Set to Let User Decide to display a checkbox that can enable / disable the option. Set to No in order to completely remove the field.
- Display Consent Checkbox: If enabled, this will display a checkbox in the form asking for the submitter's consent to collect his data.
Set the fields to No in order to disable them. Set to Required in order to render the fields as required.
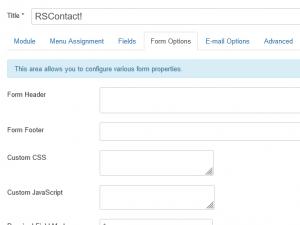
Form Options
Various form properties can be configured here:
- Form Header: add any text or HTML code here, that will represent the form's header
- Form Footer: add any text or HTML code here, that will represent the form's footer
- Custom CSS: add any CSS code that will be applied to the form's elements
- Custom Javascript: add custom Javascript code that will get loaded along with the form. Remember to not include the <script> tags.
- Required Field Marker: Set the character that will be displayed along with required fields.
- Label Position: Inside / Outside - choose whether to display the fields' captions inside or outside the inputs
- Horizontal Form: Set to Apply if Label Position is set to Outside.
- Auto Width Fields: Auto Width / Template Width
- Thank You Message: Add any text or HTML code that will be displayed after the form's submission.
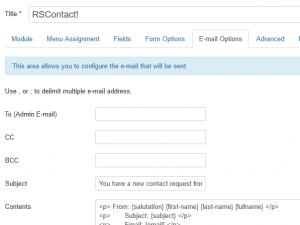
E-mail Options
Here you can configure the email that will get sent after the form's submission.
- To (Admin E-mail): Provide the email address where you want to receive the submissions
- CC: Carbon copy email
- BCC: Blind carbon copy email
- Subject: The email's subject
- Contents: The email's contents. The use of placeholders is available in order to include submission information. Please see the Available Placeholders section below.
- Use Reply-To From Submitter: Set to Yes in order to use the form submitter's address in the Reply-To field
- Reply-To: provide a Reply-To email address (if you are not using the submitter's address)
Available Placeholders
These placeholders will return the values submitted in their afferent fields:
- {your-website-url} - your website's URL
- {your-website} - your website's name, as specified in Global Configuration
- {salutation} - the Salutation field
- {first-name} - the First Name field (if Name Appearance is set to First and Last Name)
- {last-name} - the Last Name field (if Name Appearance is set to First and Last Name)
- {fullname} - the Full Name field (if Name Appearance is set to Full Name)
- {subject} - the Subject field
- {email} - the E-mail field
- {home-phone} - the Home Phone field
- {mobile-phone} - the Mobile Phone field
- {work-phone} - the Work Phone field
- {address-1} - the Address field
- {address-2} - the Address (cont.) field
- {city} - the City field
- {state} - the State field
- {zip} - the ZIP / Postal Code field
- {company} - the Company field
- {website} - the Website field
- {message} - the Message field
- {cf1} - the Custom Field 1 field
- {cf2} - the Custom Field 2 field
- {cf3} - the Custom Field 3 field
- {username} - the submitter's username
- {user-id} - the id of the submitter's account
- {user-email} - the email address associated with the user's account
- {date} - the date the submission was made on
- {date-time} - the date and time the submission was made on
- {ip} - the submitter's IP address
18 persons found this article helpful.
You Should Also Read
General Joomla! Module Configuration |
Set field value via URL |
Emails are not getting sent |
