Subscriptions
The RSEvents!Pro > Subscriptions area provides a subscription listing for all your events. The following information is being displayed: subscriber name, email address, date and IP address, event name, purchased tickets, payment gateway and subscription status. Besides these, some filtering options are also present: event, subscription status, language, payment method, From and To dates and keyword.
The subscription status can be moderated here. One of the following can be assigned: complete, incomplete, denied or refunded.
Only users that have a complete status can receive the Activation email. This is basically a confirmation email that confirms your event subscription. You can read more on it here. If for some reason, the activation email was not delivered, you can click on "Re-send activation email" button.
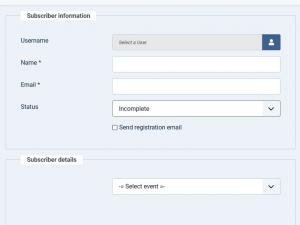
Subscriber information:
- Username: the username of the subscriber. If the subscription process does not force a user or generates one, guest will appear instead.
- Name: the name of the subscriber as specified during the subscription process.
- Email: the email of the subscriber.
- Status: subscription status. This can be one of the following: incomplete, complete, denied, refunded.
Subscription details:
This provides a subscription summary: purchased tickets, total, taxes, discounts, along with the used payment processor.
Subscription Log:
This provides a standard log with the transaction details. The information that is being displayed may differ from one payment processor to another.
You can also see a log when the subscription status is changed or when a new subscription was added.
RSform!Pro fields (optional):
If you are using a custom event registration form (learn how you can create a custom event registration form with RSform!Pro here) the additional field data will be displayed here.
When adding a subscriber from the backend area, you can also choose to send the Registration email. This is a simple email that is sent when a user subscribes to an event. You can read more on in the RSEvents!Pro > Settings area, Emails section
Exporting subscriptions
RSEvents!Pro also incorporates the possibility to export subscriptions. This is only available separately for each event, so to enable the export buttons you need to first select an event from the - Select event - dropdown to the right side of the Subscriptions tab.
Two buttons will be enabled:
- Subscribers list: Clicking on this button will generate a PDF file containing the subscriptions to the previously selected event, with the following details: username, date added, unique barcode.
- Export subscribers: Clicking on this button will generate a CSV file containing all of the submissions made for the previously selected event (including Denied and Incomplete subscriptions), along with the following details: name, email address, the date the subscription was made on, username, tickets, payment method and subscription status.
We have added the option to include table headers in the files containing the exported subscriptions. This can be enabled from Components >> RSEvents!Pro >> Settings >> Events >> Event registration >> Export headers. You can read more about the Settings tab here
Scan ticket
This feature is available through the Scan ticket button located on the top of the screen. By adding the {barcodetext} placeholder in the TicketPDF, you will be able to later scan that code using this feature in order to identify the subscription.
Note:
- You the possibility to confirm the subscriber in this area. After confirming the subscriber, when searching for the same ticket again, Subscriber confirmed will be displayed.
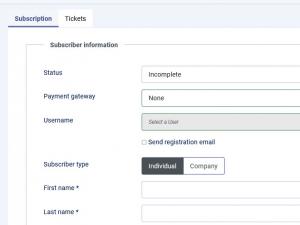
You can also add subscribers in the admin panel using the Cart plugin. Configurable options are:
Subscriber information:
- Status: subscription status. This can be one of the following: incomplete, complete, denied, refunded
- Payment gateway: select a payment method from the ones you've configured.
- Username: the username of the subscriber. If the subscription process does not force a user or generates one, guest will appear instead.
- Send registration email
- First Name / Last name - for the Individual Subscriber type
- Company Name / VAT ID - for the Company Subscriber type
- Email: the email of the subscriber.
- Checkout fields you've configured in the Cart plugin.
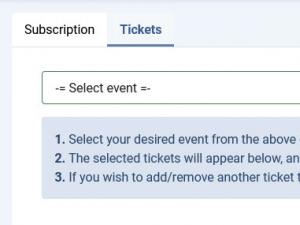
Tickets:
- Select your desired event from the above dropdown and add your selected tickets.
- The selected tickets will appear below, and if any tickets have custom fields, you will need to fill them out.
- If you wish to add/remove another ticket to the existing event block, you will need to delete all the tickets from that event, and then add them again.
6 persons found this article helpful.


