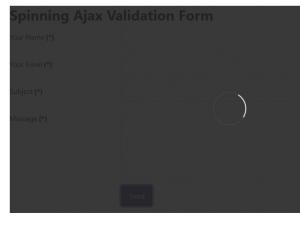
Ajax Validation Spinner effect
In this article we will show you how to display a spinning effect in combination with the Ajax Validation on your form, after clicking the Submit button.
Create your form
First you will need to create a form from Components > RSForm!Pro > Manage forms > New or New (Wizard). Let's take the following form as an example, on the first screenshot you'll see the simple form before clicking on the Submit button and in the second screenshot you'll see the spinner in action.
The Ajax Validation option from your Form Properties > Form Info area needs to be enabled in order for this to work.
Add the CSS code
Edit your form > go to Form Properties > CSS & JavaScript > CSS area and add the following code (this is fully customizable according to your needs):
<style>
.overlay__open {
    position: relative;
}
.overlay {
    left: 0;
    top: 0;
    width: 100%;
    height: 100%;
    position: absolute;
    opacity: 0.9;
    background: #222;
    z-index: 9999;
}
.overlay__inner {
    left: 0;
    top: 0;
    width: 100%;
    height: 100%;
    position: absolute;
}
.overlay__content {
    left: 50%;
    position: absolute;
    top: 50%;
    transform: translate(-50%, -50%);
}
.spinner {
    width: 75px;
    height: 75px;
    display: inline-block;
    border-width: 2px;
    border-color: rgba(255, 255, 255, 0.05);
    border-top-color: #fff;
    animation: spin 1s infinite linear;
    border-radius: 100%;
    border-style: solid;
}
@keyframes spin {
  100% {
    transform: rotate(360deg);
  }
}
</style>
Add the PHP Script
Next you will need to add a custom script in the 'Script called before form is generated' area, found under Form Properties while editing your form.
Joomla\CMS\Factory::getApplication()->registerEvent('onRsformFrontendAJAXScriptCreate', 'addValidationToForm');

function addValidationToForm($args)
{
  if ($args instanceof \Joomla\Event\Event)
  {
    $args = $args->getArguments();
    $args = reset($args);
  }

  $script = &$args['script'];
  $formId = $args['formId'];

  $script .= <<<EOF

  var form = RSFormPro.getForm({$formId});

  switch (task)
  {
    case 'beforeSend':
      var overlay = document.createElement('div');
      overlay.classList.add('overlay');

      var overlay__inner = document.createElement('div');
      overlay__inner.classList.add('overlay__inner');

      var overlay__content = document.createElement('div');
      overlay__content.classList.add('overlay__content');

      var spinner = document.createElement('span');
      spinner.classList.add('spinner');

      overlay__content.appendChild(spinner);
      overlay__inner.appendChild(overlay__content);
      overlay.appendChild(overlay__inner);

      form.appendChild(overlay);
      form.classList.add('overlay__open');
    break;

    case 'afterSend':
      var overlay = document.querySelector('.overlay');

      if (overlay)
      {
        overlay.parentNode.removeChild(overlay);
      }

      form.classList.remove('overlay__open');
    break;
  }
  EOF;
}
If you're planning on adjust the CSS class names, make sure to change these in the PHP code as well, otherwise, it won't work.
3 persons found this article helpful.


