How to Create a Payment Form with RSForm!Pro
How to Create a Payment Form with RSForm!Pro
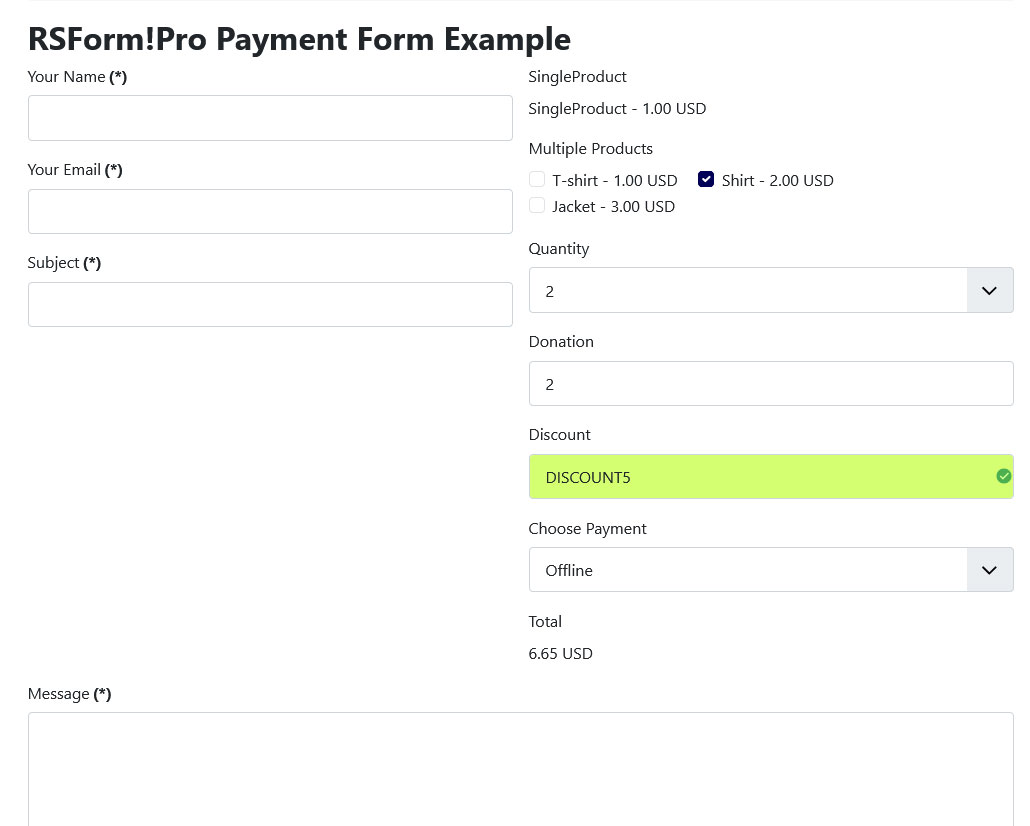
Creating a payment form with RSForm!Pro involves installing the necessary payment plugins, configuring them, and designing your form to handle transactions. Below is a simple guide to help you set up a payment form in no time. You can check a demo payment form here. You can download the demo sample form from the link below.
Payment sample formStep 1: Install the RSForm!Pro Payment Package
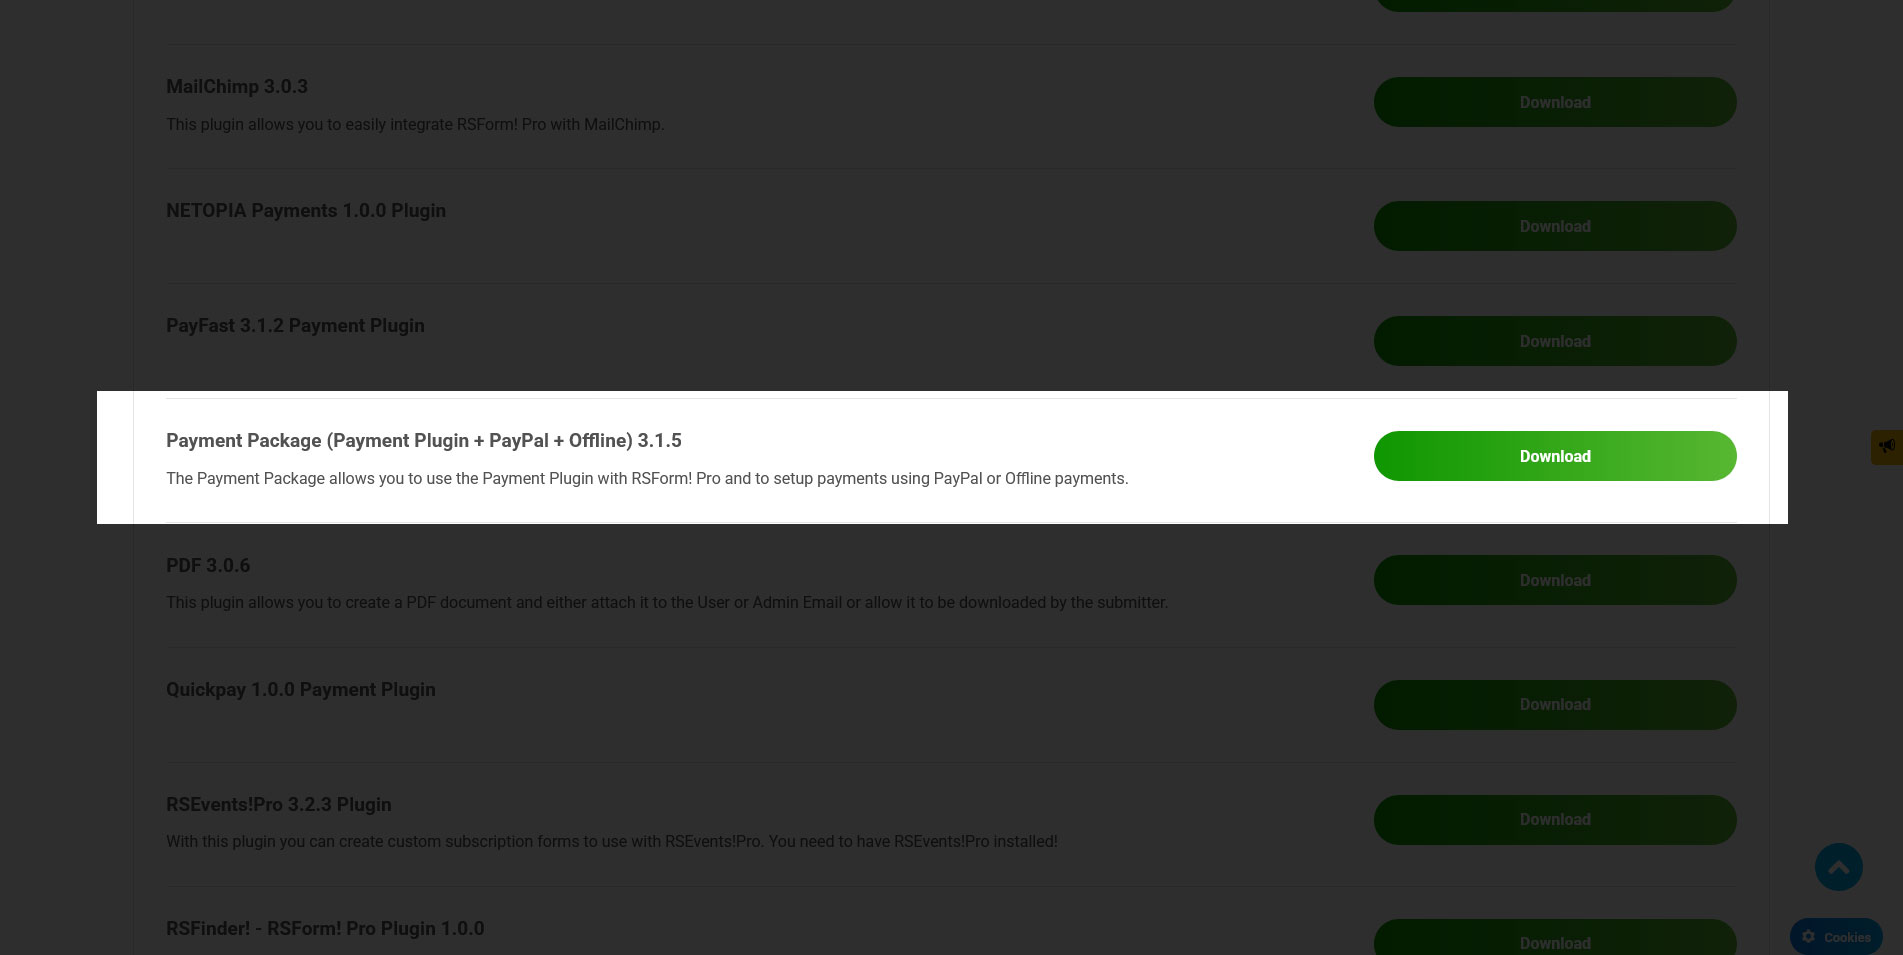
- Download the Plugin:
- Log in to your RSJoomla! account.
- Navigate to Downloads > My Downloads.
- Download the Payment Package.
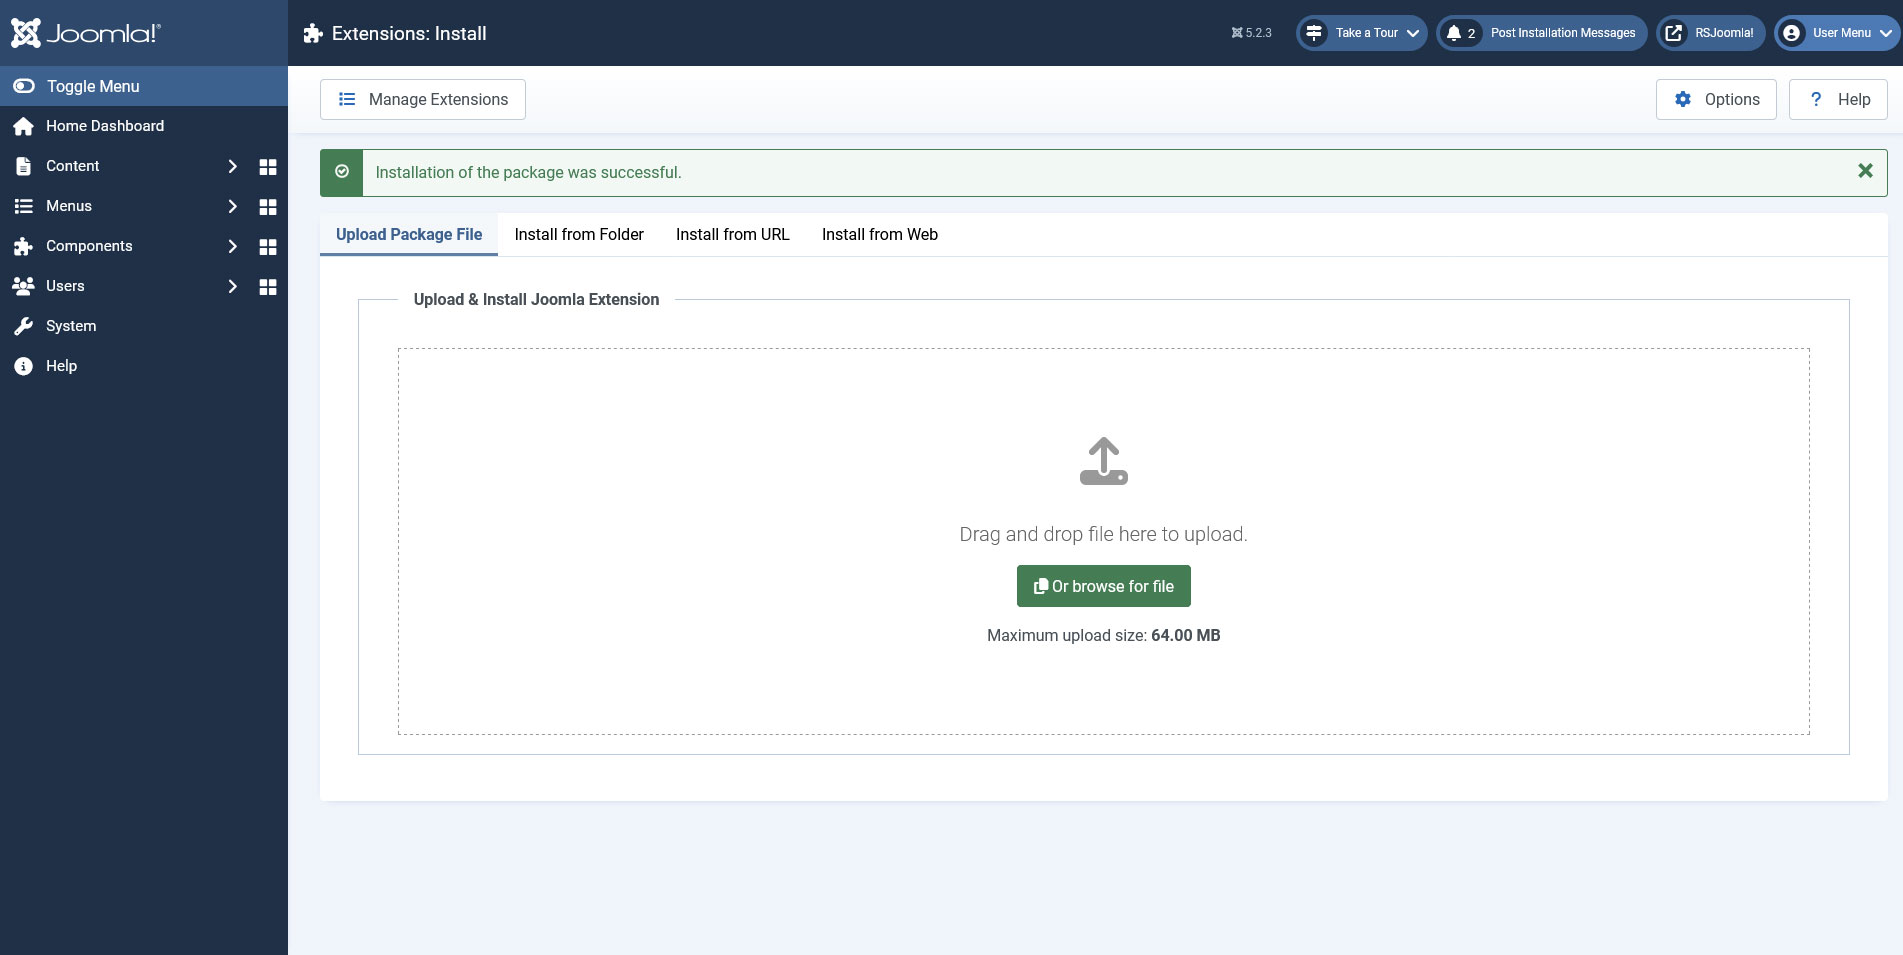
- Install the Plugin:
- Access your Joomla! administrator panel.
- Go to Extensions > Extension Manager > Install.
- Upload the downloaded file and click Upload & Install.
Step 2: Configure the Payment Settings
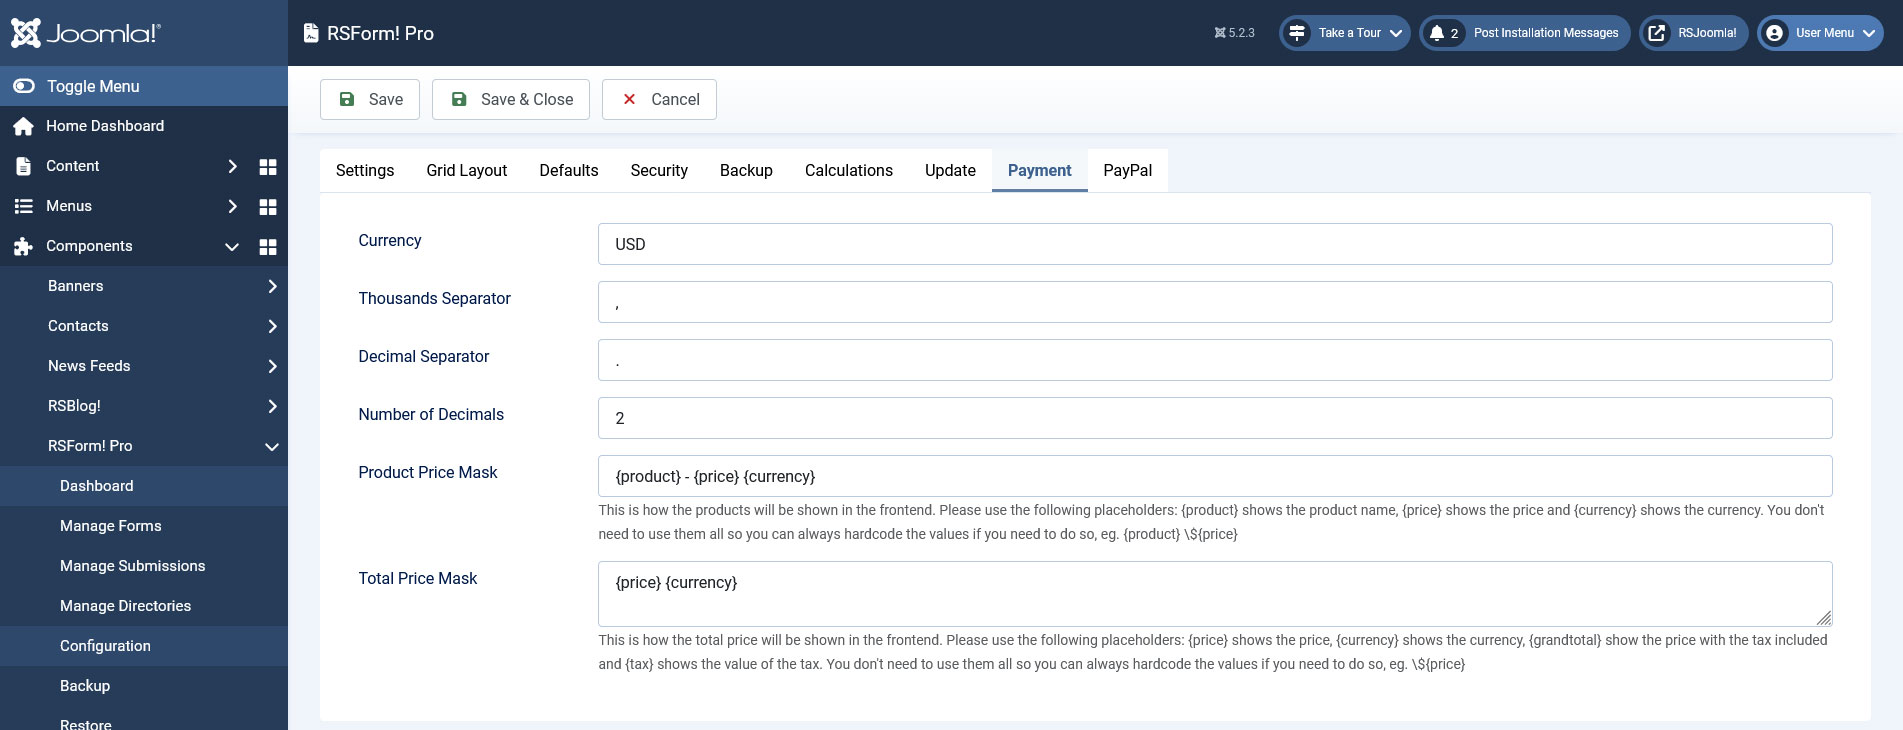
After installation, configure the payment options:
- Currency: Enter a 3-character currency code, for example USD - United States Dollar. Please consult this list when setting up your preferred currency.
- Thousands Separator: Set a character to separate thousands. By default, this is set to , (comma)
- Decimal Separator: Set a character to separate decimals. By default, this is set to . (dot)
- Number of Decimals: Set a number of decimals to work with
- Product Price Mask: Use the following placeholders to define a price mask for your multiple products fields: {product}, {price} and {currency}. You can place them in any order you like, and separate them by any characters or text. The multiple product fields' items will be generated based on this price mask
- Total Price Mask: This is how the total price will be shown in the frontend. Use the following placeholders: {price} shows the price, {currency} shows the currency, {grandtotal} show the price with the tax included and {tax} shows the value of the tax. You don't need to use them all so you can always hardcode the values if you need to do so, eg. ${price}
Configure the PayPal (v1) plugin
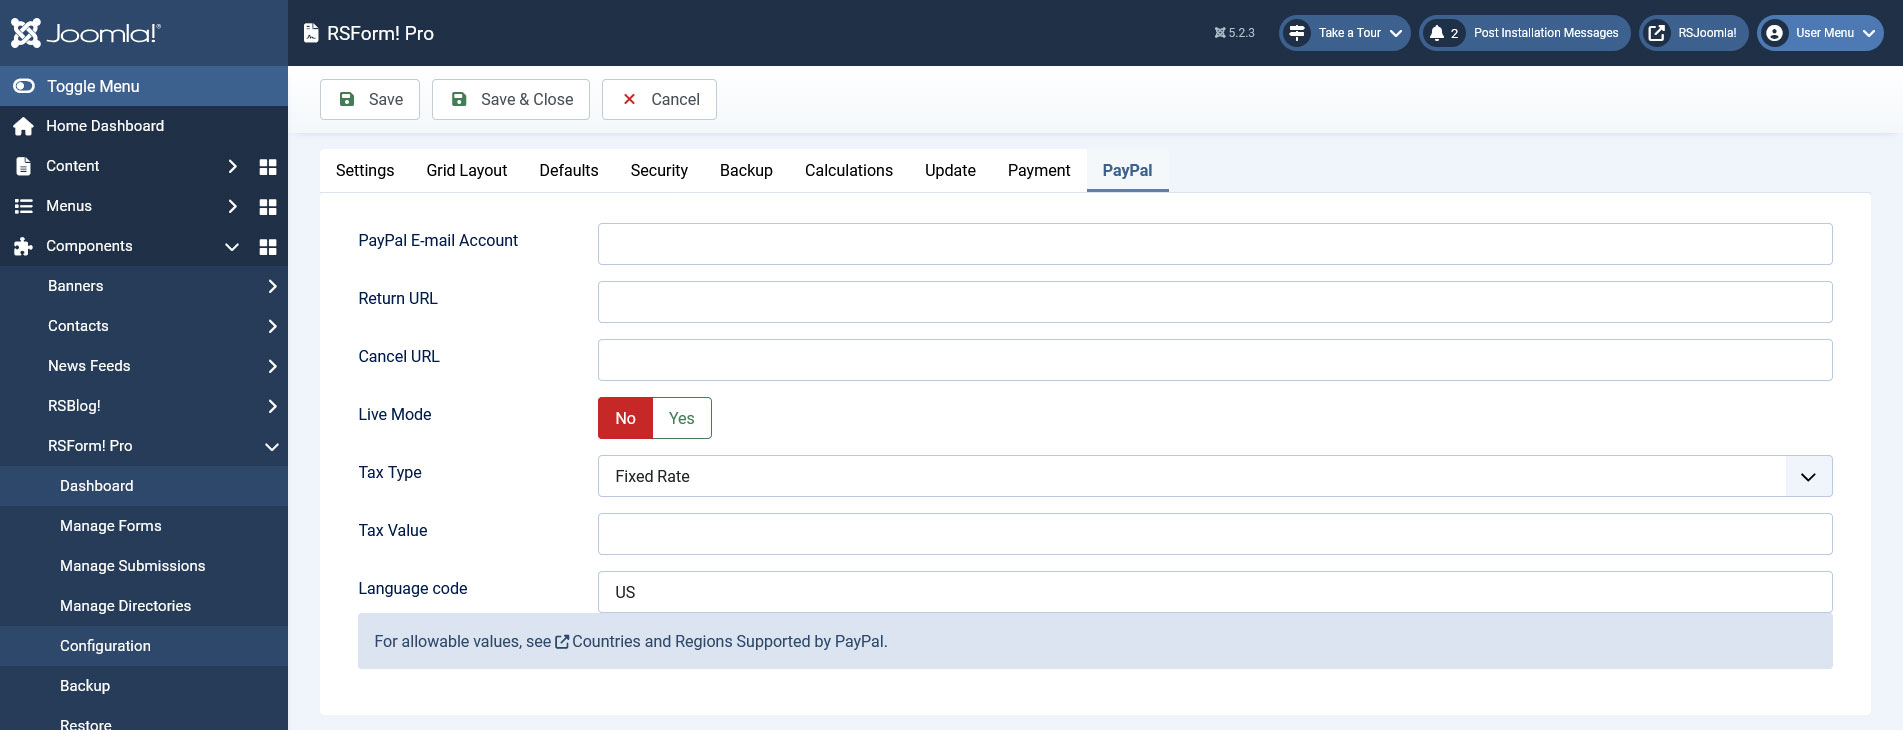
In this example, we will use the default PayPal v1 integration plugin, which comes included with the RSForm!Pro Payment Package. The following options are available:
- PayPal E-mail Account: the email address you have used when creating your PayPal account
- Return URL: Optional, provide an URL to which the users will be redirected after finalizing the payment
- Cancel URL: Optional, provide an URL to which the users will be redirected after cancelling the payment
- Live Mode: Yes / No - set to No in order to enable the testing mode
- Tax Type: Percent (%) / Fixed Rate - Optional, set how you want to tax the form submitters - by a percentage of the total or by a fixed value
- Tax Value: Set the value that will be applied in conjunction with the Tax Type field. Leave blank if you do not wish to apply a tax
- Language code: Provide a 2-character language code. Please consult the Countries and Regions Supported by PayPal list for more information
Step 3: Design Your Payment Form
Now, create your form and add the necessary fields as follows:
- Navigate to Components > RSForm!Pro > Manage Forms and click New.
- Add fields for user details (name, email, address).
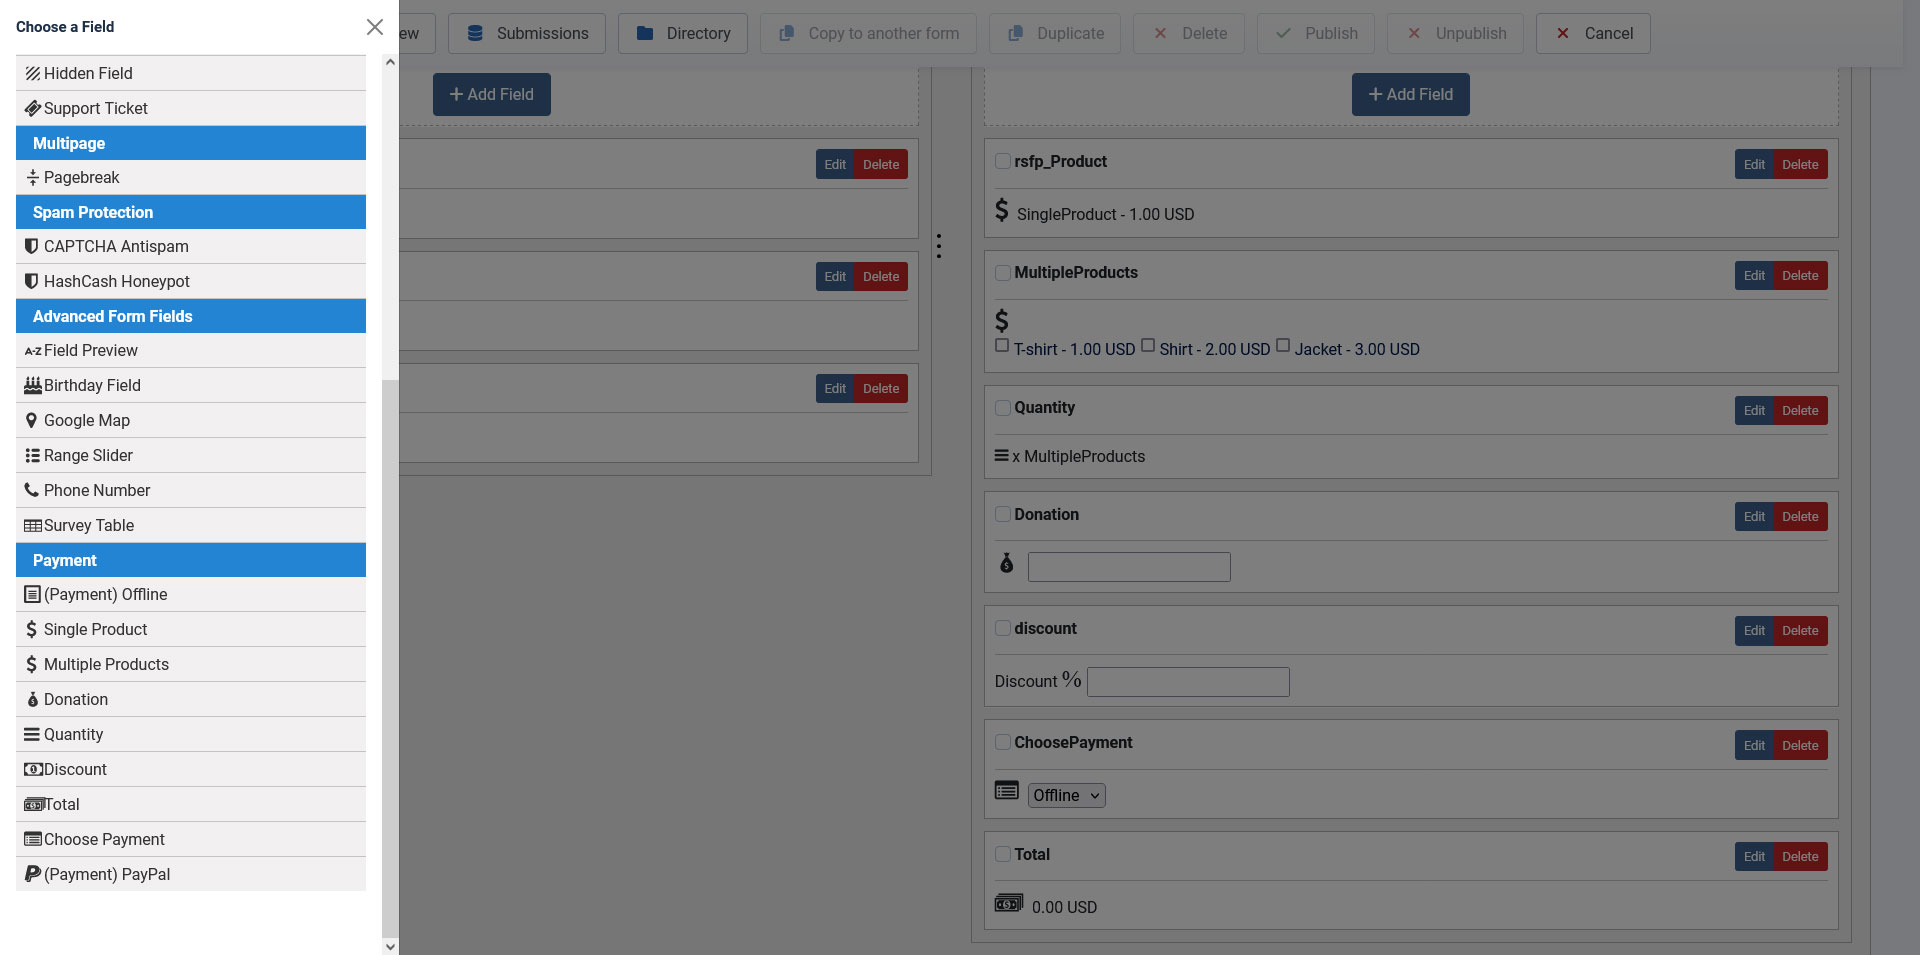
- Add the following fields to the form:
- Single Product: For this type of field you can set up a caption, description and a price. Being a single use field (you can add only one in a given form), its internal name will always be the same, rsfp_Product.
- Multiple Products: Adds the ability to display multiple products to be purchased either in a Dropdown, a Checkbox or a Radio. Its items need to be specified in the following manner: price|label > e.g: 15|T-shirt
- Donation: Allows the user to type in the amount to be paid inside a standard Textbox.
- Quantity: The quantity fields allows the user to choose the amount of products (simple or multiple).
- Discount: This field allows users to setup a Discount through Coupon Codes which can be found under Additional Attributes area. Add each value on a new line in the form of discount|code.
- Add a Total field to display calculated amount.
- Add the Choose Payment field to allow the user to choose his payment method.
- Add the actual Payment Method fields. After adding the payable "products" to your form, you need to add the Payment methods. The Payment methods have a (Payment) keyword in front of their name.
Step 4: Configure Email Notifications
Decide when to send email notifications, either after form submission or after payment confirmation.
- Go to Form Properties > User Emails and Admin Emails.
- Customize email content to include payment details.
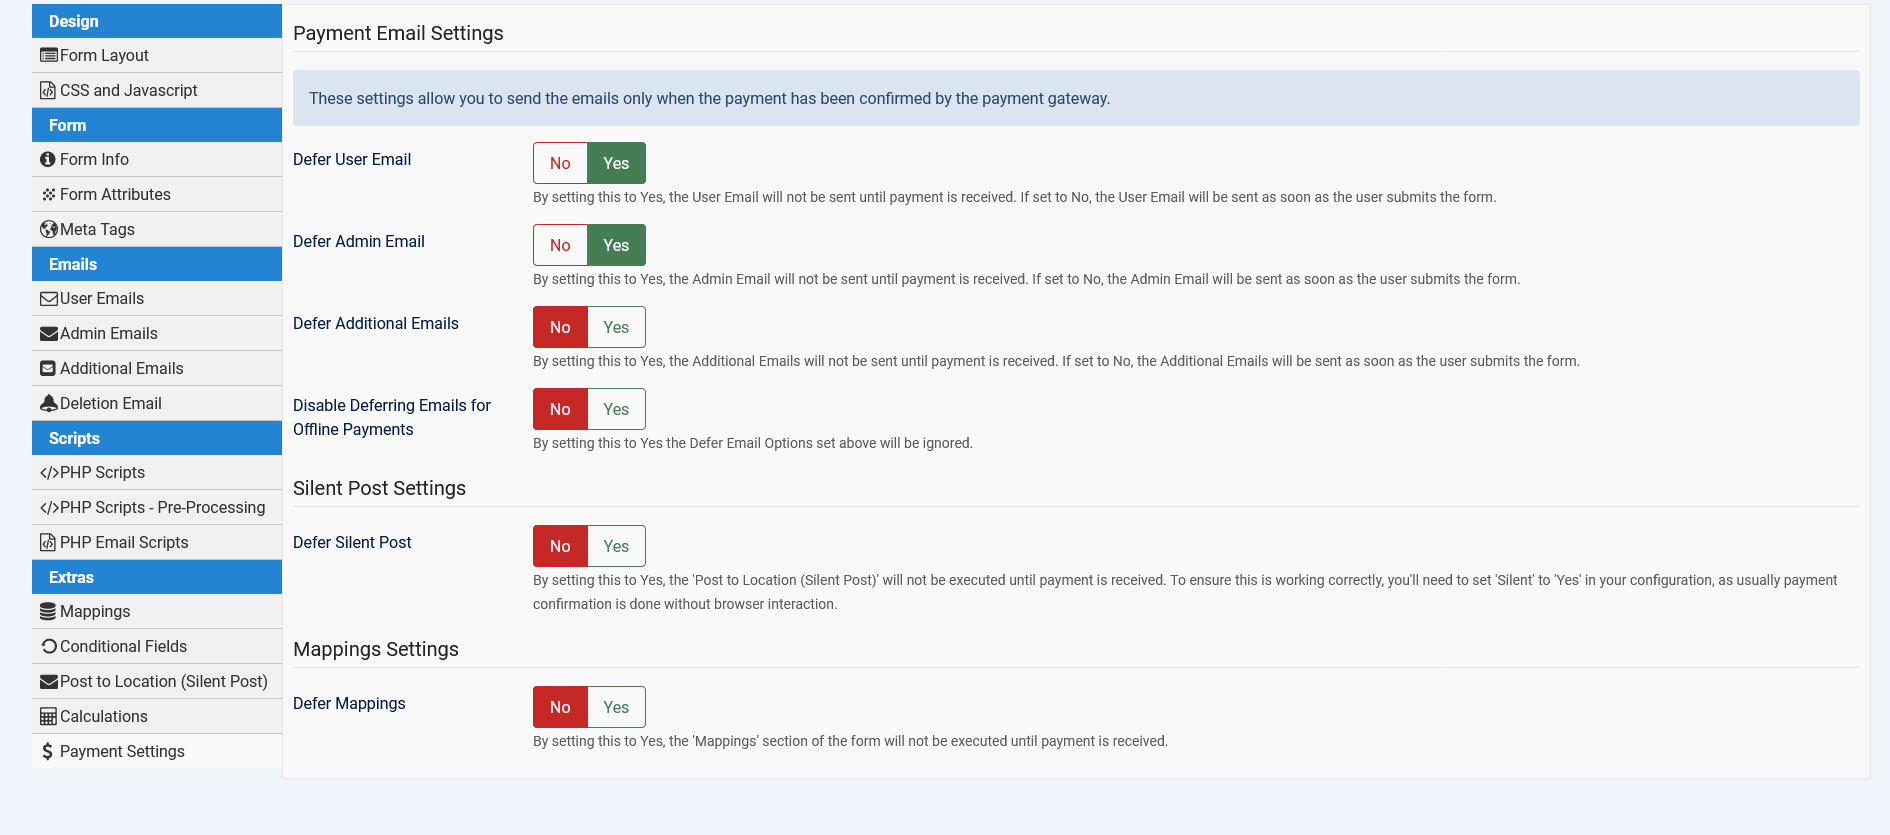
- Set whether to defer emails after the payment is made, under Form Properties > Payment Settints tab:
- Defer User Email: By setting this to "Yes" the User Email will be sent when the purchase is confirmed by the Payment gateway.
- Defer Admin Email: By setting this to "Yes" the Admin Email will be sent when the purchase is confirmed by the Payment gateway.
- Defer Additional Emails: By setting this to "Yes" all of the Additional Emails will be sent when the purchase is confirmed by the Payment gateway.
- Disable Deferring Emails for Offline Payments: By setting this to "Yes" all of the Emails will be skipped from deferring when the purchase was made using Offline Payment
- Defer Silent Post: By setting this to Yes, the 'Post to Location (Silent Post)' will not be executed until payment is received. To ensure this is working correctly, you'll need to set 'Silent' to 'Yes' in your configuration, as usually payment confirmation is done without browser interaction.
- Defer Mappings: By setting this to Yes, the 'Mappings' section of the form will not be executed until payment is received.
Step 5: Test Your Payment Form
Before going live, test the form to ensure it works correctly.
- Use the Preview button to see how the form looks.
- Perform test submissions with different payment methods.
All other RSForm!Pro payment integrations require the fields associated with the Payment Package plugin, as specified in Step 3. You must include one type of product field: either a Single Product or Multiple Products field. Fields like Donation, Discount, and Quantity are optional. You can only use one Single Product field, but you can configure more Multiple Products fields.