Plugin - Google Tracker (Track form events, abandonment and referers)

The plugin can be downloaded by logging into our website using the account that holds the subscription and heading to Downloads > My Downloads area.
Download the pluginThe RSForm!Pro Google Tracker plugin is a plugin that once installed and enabled will allow you to add your Google Analytics code to your site
and keep track of your form events.
Downloading and Installing the plugin
Download
You can download the plugin by logging with your purchase user, then head to Downloads > My Downloads > RSForm!Pro - view all plugins and modules > "Google Tracker Plugin x.x".
Install
Go to the Extensions > Manager > Install page, and install the plugin. Publish the plugin from Extensions > Plug-in Manager, search for the "System - RSForm! Pro Google Tracker" plugin.
Does this plugin work with Google Analytics 4 (GA4)?
Yes, it does.
The Google Tracker script relies on using the Google tag.js loaded on the page - through the gtag() function.
If you have setup your tag through Google Tag Manager, this is not available by default. To solve this, simply follow their migration docs: Enable the gtag.js API
To enable the gtag.js API add the following snippet of code to the top of your page above your Tag Manager container snippet:
  <script>
  window.dataLayer = window.dataLayer || [];
  function gtag(){dataLayer.push(arguments);}
  </script>
Relying on Universal Analytics 3 is discouraged although the script will still process the events through the legacy ga() function.
Configuring the plugin
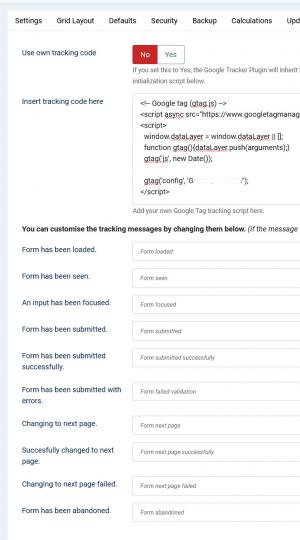
Configuring the Google Tracker plugin can be done from Components >> RSForm!Pro >> Configuration >> Google Analytics tab:
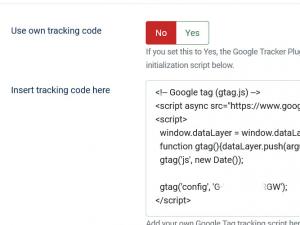
- Use own tracking code: if you set this to Yes, the Google Tracker Plugin will inherit the current Analytics script. If set to No, then you can specify your own Analytics initialization script below.
- Insert tracking code here: this is where you include your Google Analytics tracking code, when the above option is disabled.
You can customise the tracking messages using the following options:
- Form has been loaded - custom message recorded when the form has been loaded
- Form has been seen - custom message recorded when the form has been seen
- An input has been focused - custom message recorded when an input has been focused
- Form has been submitted - custom message recorded when the form has been submitted
- Form has been submitted successfully - custom message recorded when the form has been submitted successfully
- Form has been submitted with errors - custom message recorded when the form has been submitted with errors
- Changing to next page - custom message recorded when changing the page
- Successfully changed to next page - custom message recorded when successfully changing the page
- Changing to next page failed - custom message recorded when changing to next page failed
- Form has been abandoned - custom message recorded when the form has been abandoned
Plugin Form Fields
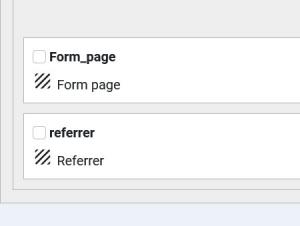
Referrer field - this field is used in order to record the page the user was viewing before the submission of the form was made. The referer will be visible within the Submissions View section of the form.
Page field - this field is used in order to record the page where the form was submitted. If the form is displayed on multiple pages, you will be able to view page where the submission of the form was made, within the Submissions View section.
Note: These fields will not be visible in the frontend. They will be added as hidden fields at the bottom of the form. You can check their values under Manage Submissions area of your form.
Tutorial: How to use Google Tracker plugin
Generate a Google Analytics tracking code
- Sign in into your Google Analytics account
- Select the Admin tab.
- Select an account from the dropdown in the ACCOUNT column.
- Select a property from the dropdown in the PROPERTY column.
- Under PROPERTY, click Data Streams - View tag instructions - Install manually.
Configure the RSForm!Pro Google Tracker plugin
- Head to Components > RSForm!Pro > Configuration > Google Analytics tab
- Make sure the Use own tracking code option is set to No
- Paste the tracking script into the Insert tracking code here field
- Customise the tracking messages(optional)
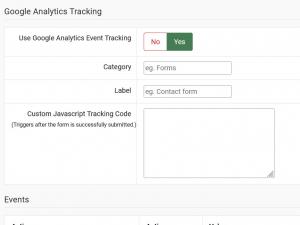
- Head to Components > RSForm!Pro > Manage Forms > Select your form > Properties > Google Tracking tab
- Set to Yes the Use Google Analytics Event Tracking? option
- Specify the category of the event being tracked
- Specify the label of the event being tracked
- Go to Events section at the bottom
- Activate the events that should be tracked
- The "Value" areas will only accept numerical values and it's recommended that you use 1 and not 0 for tracking an event.
Version 3.2.1
- Added - Joomla! 5 native compatibility - no longer needs the 'Behaviour - Backward Compatibility' plugin.
Version 3.2.0
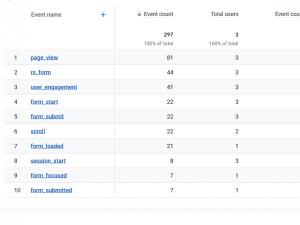
- Updated - All form events now show up as "rsform_" + event (eg. rsform_submitted_successfully).
- Updated - Removed Universal Analytics support.
Version 3.1.1
- Updated - Improved detection of gtag() availability.
Version 3.1.0
- Updated - Google Tracker fields will now be placed in the 'Tracking fields' group.
- Updated - You can only have one 'Referrer' or 'Form page' field per form.
Version 3.0.1
- Fixed - 'Referrer' and 'Form Page' fields no longer take up space in the form.
Version 3.0.0
- Updated - Joomla! 4.0 and RSForm! Pro 3.0 compatibility.
Version 1.51.4
- Fixed - Tracking events were not working when 'Disable Submit Button on Submission' was set to 'Yes'.
Version 1.51.3
- Upgraded - Now detects Google Tag Manager as well.
Version 1.51.2
- Fixed - An issue when publishing the form through the System Plugin.
Version 1.51.1
- Fixed - Duplicating a form would not carry over the Google Tracker configuration.
Initial Release
13 persons found this article helpful.


