Silent post
With RSForm! Pro you can submit your form's data to another location, while still having emails sent and submissions recorded in the database. Let's begin!
-
Let's assume that you have a basic form that looks like this:
  <form method="post" action="https://www.myserver.com/myaction.php">
  <p>First Name: <input type="text" name="first_name" value="" /></p>
  <p>Last Name: <input type="text" name="last_name" value="" /></p>
  <p>Email: <input type="text" name="email" value="" /></p>
  <p><input type="hidden" name="my_hidden_id" value="55" /></p>
  <p><input type="submit" name="mysubmit" value="submit this form" /></p>
  </form>

-
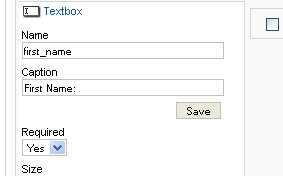
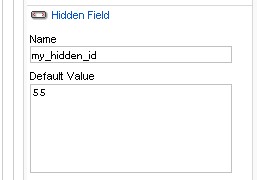
What you need to do right now is re-create this form with RSForm! Pro. Just add all the fields in your current form and keep the same naming convention. For example, if you want to add the text field "First Name", look for the name="" attribute and add a Textbox in RSForm! Pro with the same name. In our case, it will be first_name.

If you need general help with adding new fields with RSForm! Pro, you can view our video tutorial.


The form should look almost the same as your initial form:

-
Now, get the action="" attribute of your form and add it in the code below. In our case, the action is https://www.myserver.com/myaction.php. You usually won't need to modify anything else in the code.
// this is your form's action URL
$url = 'https://www.myserver.com/myaction.php';

// Build the data from our form
$data = http_build_query($_POST['form']);

// Get the HTTP connector
$http = Joomla\CMS\Http\HttpFactory::getHttp();
$response = $http->post($url, $data);
This script needs to be placed in the "Script called after form has been processed" field, which you can find in the Scripts tab (it's the 3rd textbox).
8 persons found this article helpful.
You Should Also Read
Post to location (silent post) HOT |
How to trigger the Silent Post feature based on user selection |

