Memberships
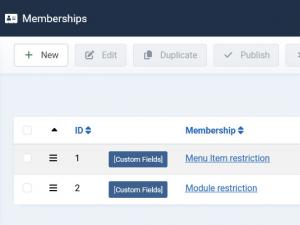
In the RSMembership! Memberships tab you can Add, edit, duplicate, publish/unpublish and delete memberships.
Membership General View - summary
- ID - the membership's internal ID
- Membership - the name of the current membership
- Category - the category that the membership is associated with
- Length - the membership availability time from the time of the purchase approval
- Price - the membership purchase price
- Published - set whether the membership is published or not
Membership Custom Fields
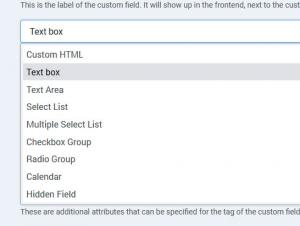
Associated with each membership, in the memberships listing, you will find a [Custom Fields] button. By clicking on it, you will be able to define any number of custom fields for that specific membership. The following field types are available:
- Custom HTML
- Text box
- Text Area
- Select List
- Multiple Select List
- Checkbox Group
- Radio Group
- Calendar
- Hidden Field
Field configuration parameters
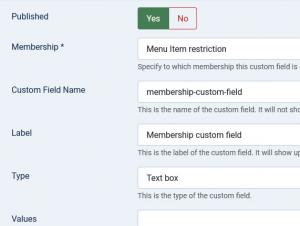
Most field types include the following configuration options:
- Published: Yes / No - set whether the field is published or not
- Membership: Choose the membership the field is associated with. Only one membership can be selected
- Custom Field Name: Set the field's internal name - not visible in the frontend
- Label: Set the field's label - this is visible in the frontend
- Type: Choose the field's type. There are 9 types available: Text box, Text Area, Select List, Multiple Select List, Checkbox Group, Radio Group, Calendar, Hidden Field and Custom HTML
- Values: Set the field's default value. If the field's type is either a Select List, Multiple Select List, Checkbox Group or a Radio Group, you will need to specify its items here, each on a separate line
- Additional Attributes: Specify additional HTML attributes (e.g.: readonly="readonly" - renders the field as readonly)
- Required: Yes / No - set to Yes to render the field as required (not available for Custom HTML)
- Validation Rule: Choose from one of the validation rules listed below (not available for Custom HTML)
- Validation Message: Set a message that will be displayed when the field does not pass validation (not available for Custom HTML)
Validation Rules
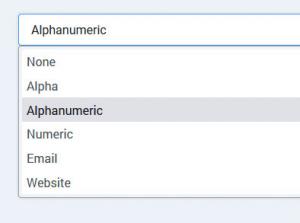
You can set up, for each field, a validation rule. The data submitted within the field will be compared with the standard imposed by this rule and, if it doesn't match the rule, the form will not be submitted and the validation message will be displayed. The following options are available:
- None: Select this option if you don't want any validation rules set for your field
- Alpha: Only letters are allowed (a-z, A-Z)
- Alphanumeric: Letters and numbers are allowed (a-z, A-Z, 0-9)
- Numeric: Only numbers are allowed (0-9)
- Email: The submitted information needs to be in the form of an email address (e.g. mail@domain.com, email@website.eu, etc. )
- Website: Only website URL's will pass (e.g. website.com, www.mywebsite.eu). URL's of the http://www.website.com form will NOT pass validation
Watch the video tutorial:
Ep. 60: How to create Joomla! membership websites with RSMembership!
Membership configurable items:
The membership configurable items are divided into the following tabs: Membership Information, Stock & Activation, Membership Extras, Shared Content, Messages, Subscriber's, Email Settings, Subscriber's Email, Administrator's Email and Advanced Customization
Membership Details
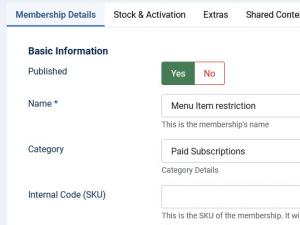
This tabs offers the possibility to perform some basic settings for your membership. These settings are grouped into 5 relevant areas:
Basic Information
- Published - Yes / No - Set if the membership is published or not.
- Name - The actual name of the membership. This will actually appear for both front-end and back-end use.
- Category - The category of the membership (we have added the possibility to group memberships into categories).
- Internal Code (SKU) - A stock-keeping unit or SKU is a unique identifier for each distinct product and/or service that can be purchased.
- Term name - For each of your configured memberships you can set your own Terms and conditions that will be displayed on the subscription. Note that these can be also displayed as separate menu items
- Thumbnail Image - You can set a membership logo that can be sized according to your needs (jpg only)
- Thumbnail width - You can specify the width of the thumbnail (in pixels). The height will be automatically calculated based on the value specified in this field. Remember to check Resize to in order for this to be applied.
- Description - configurable membership description area - supports WYSIWYG editors
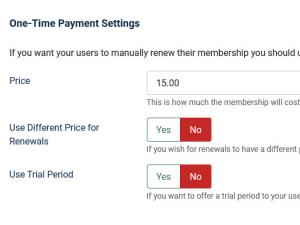
One-Time Payment Settings
- Price - actual price of the membership
- Use different price for Renewals yes / no - enabling this option will allow you to set a smaller (or higher) price after the user first subscribes to a membership
- Renewal Price - numeric value of the renew membership cost
- Use Trial period - numeric value of the period length. Note that one must integer values (e.g. 1,2,3...)
- Trial price - the trial can have a price or not ( 0 price )
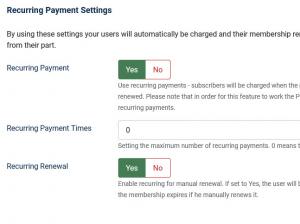
Recurring Payment Settings
- Recurring Payment - this setting can be used to activate recurring subscriptions (available through the PayPal, Stripe and Authorize.Net gateways)
- Recurring payment times - textbox, add the number of times recurring payments will be triggered.
- Recurring Renewal - Enable recurring for manual renewal. If set to Yes, the user will be charged automatically when the membership expires if he manually renews it.
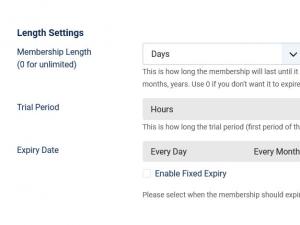
Length Settings
- Membership Length - the validity length in terms on time of the membership (days, months, years)
- Trial Period - the validity length in terms on time of the trial period (days, months, years)
- Expiry Date - memberships can have a fixed expire date, not taking into account the subscription date of the user. You can choose from a fixed Day, Month or Year, or select Each Day / Each Month / Each Year, for example, 1 / June / Every Year.
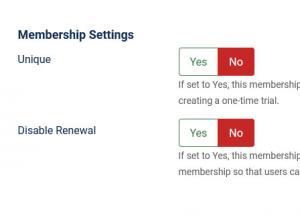
Membership Settings
- Unique - if set to "Yes", the membership can only be subscribed to once for each user
- No renewal - if set to "Yes", users will not be able to renew the membership once it has expired.
- {extras}: name of selected Extra options
- {buy}: adds a "buy" button
- {price}: price of the current membership
Note: only the {price} placeholder is available for this area.
The {rsmembership-subscribe ID} generates an URL for purchasing the membership who's ID was specified within the placeholder. You can use it inside an href attribute in order to customize the purchase link:
<a href="{rsmembership-subscribe ID}">Click here to purchase a membership</a>
Also, it can be placed in any HTML area on your website.
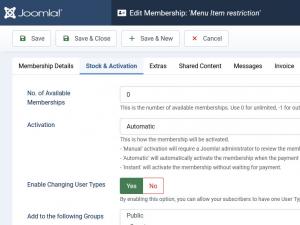
Stock & Activation
- No. of Available Memberships - Here you can set a limited number of available memberships - 0 for unlimited number, -1 for a out of stock setting
- Activation - You can control how the membership will become active:
- Manual - After the user has subscribed to membership, the administrator will have to manually approve the request from the Transactions tab.
- Automatic - The membership becomes active only after the payment has been confirmed by the payment gateway. Note that this has a variable time window, depending on the purchase, payment information and payment gateway.
- Instant - The membership is instantly activated.
- Enable changing user types - you can upgrade the user's account once he subscribes. You will only need to select the access level your want the user to have from the list.
- Add to the following Groups - When the membership is approved, the user will be added to the selection made here
- Remove the following Groups when expiring - When the membership expires, you can remove the user from User Groups that he belonged
- Disable Account When Membership Expires ? - this option allows you to disable the user account completely when the subscription period expires
Important! this user group changing feature takes into account the global "Replace User Groups instead of updating" option.
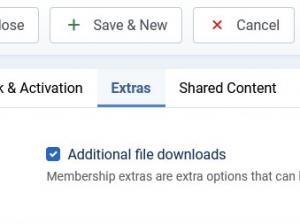
Membership Extras
For each membership you can set some extra options, like additional folder sharing for example.
You care read more about extras in Membership Extra tab.
Watch video tutorials:
- How to add article restriction
- How to add URL restrictions using the {?} wildcard
- How to add URL restrictions using the {*} wildcard
- How to restrict Joomla! categories to paid subscribers
- How to restrict Joomla! sections to paid subscribers
- Restrict ZOO content
- Restrict FLEXIcontent
- Restrict K2 content
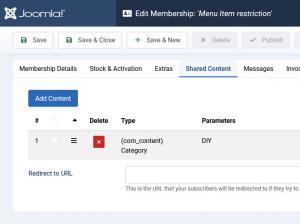
- If the user does not have the appropriate membership, or isn't logged in you can set a custom redirect.
- In the Add Content > URL you can use the following wildcards:
- {*}: it replaces a unlimited number of chars. For example if you have configured something like index.php?option=com_virtuemart{*}, the user will need to have the membership active to access any page that contain index.php?option=com_virtuemart.
- {?}: it replaces only one char, meaning that you can set up something like this: index.php?option=com_virtuemart&itemid={?}{?}&category=32
Messages
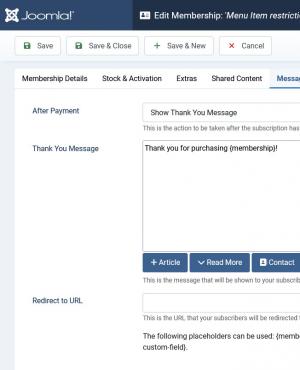
RSMembership! offers the possibility to set redirection URLs or "Thank you messages" depending on the purchased membership.
This tab will allow you to set whether you wish to display a message or to redirect:
- After Payment: display message/redirect URL
- Thank You Message: WYSIWYG editor area that allows to set custom HTML messages
- Redirect to URL: configurable text box, where you can set the URL, for example: http://link1.com
- {membership} - returns name of the selected membership
- {category} - returns name of the membership's category
- {extras} - returns the selected options
- {email} - email address used for the subscription
- {name} - registered name
- {username} - the username chosen by the user for his account
- {address}
- {city}
- {state}
- {zip}
- {country}
- {continue} - returns a "Continue" button that redirects to the configured Return URL option
- {coupon} - returns the coupon code used
- {payment} - returns the payment gateway used
- {price} - returns the membership price
- {transaction_id} - returns the ID of the transaction
- {membership-custom-field} - returns the membership custom fields
Invoice
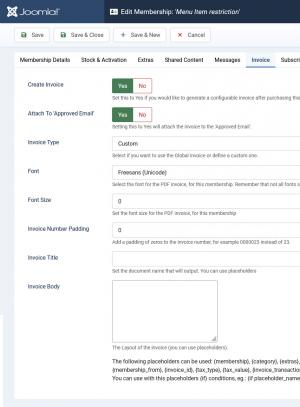
RSMembership! offers the possibility to set an Invoice when purchasing a membership.
This tab offers the following configuration parameters:
- Create Invoice: Set this to Yes if you would like to generate a configurable invoice after purchasing this membership.
- Attach To 'Approved Email' : Setting this to Yes will attach the invoice to the 'Approved Email'.
- Invoice Type: Select if you want to use the Global Invoice or define a custom one.
- Font: Select the font for the PDF invoice, for this membership. Remember that not all fonts support all characters, so choose the correct font if you would like unicode support.
- Font Size: Set the font size for the PDF invoice, for this membership.
- Invoice Number Padding: Add a padding of zeros to the invoice number, for example 0000023 instead of 23.
- Invoice Title: Set the document name that will output. You can use placeholders.
- Invoice Body: The Layout of the invoice (you can use placeholders).
- {membership} - returns name of the selected membership
- {category} - returns the membership category
- {extras} - returns the selected options
- {email} - email address used for the subscription
- {name} - registered name
- {username} - the username chosen by the user for his account
- {total_price} - the total price
- {coupon} - returns the coupon code used
- {discount_type} - returns the type of the discount applied
- {discount_value} - returns the value of the applied discount
- {payment} - returns the payment gateway used
- {transaction_id} - returns the id of the transaction
- {transaction_hash} - returns the hash of the transaction
- {membership_from} - returns the form of the chosen membership
- {invoice_id} - returns the id of the invoice
- {tax_type} - returns the type of tax used
- {tax_value} - returns the value of the tax
- {invoice_transaction_table} - returns the table of the invoice transaction
- {date_purchased} - returns the purchasing date
- {site_name} - returns the site name
- {site_url} - returns the site url
- {address}
- {city}
- {state}
- {zip}
- {country}
- {membership-custom-field} - returns the membership custom fields
You can use with this placeholders {if} conditions. Eg.: {if placeholder_name} content {/if}
Subscriber's Email
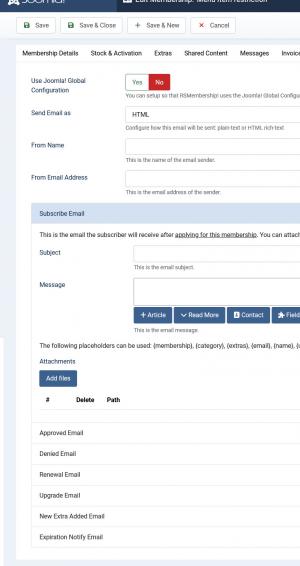
In this area you are able to set general, header information for the configurable emails located under the Subscriber's Email:
- Use Joomla! Global Configuration: You can setup so that RSMembership! uses Joomla! Global Configuration settings in order to prefill the "From Name" and "From Email Adress" when sending the emails
- Send Email as: Plain text/HTML
- From Name: The name of the email sender
- From Email Address: The email address of the sender
In this area you are able to set the email body for various emails:
- Subscribe: email sent to the subscriber, received after applying for the current membership. You can set attachments to this email.
- Approved: email sent to the subscriber, received after his subscription is approved. Here you can use the following specific placeholders: {membership_start}, {membership_end}.
- Denied: email sent to the subscriber if the transaction is denied.
- Renewal: email sent to the subscriber, received after placing a renewal order for the current membership.
- Upgrade: email sent to the subscriber, received after upgrading the current membership. You can use the specific '{membership_from}' placeholder which will return the mebership from which the upgrade was performed.
- New Extra Added: email sent to the subscriber, received after adding a membership extra.
- Expiration Notify Email: this is the email the subscriber will receive when his membership is about to expire (before a predefined period of time). You can set up the number of days prior to the membership's expiration when the email will be sent. This is done in the Send expiration notification email before field. By setting it to 0, the email will be sent once the membership expires.
- {membership} - returns name of the selected membership
- {category} - returns the membership category
- {extras} - returns the selected options
- {email} - email address used for the subscription
- {name} - registered name
- {username} - the username chosen by the user for his account
- {address}
- {city}
- {state}
- {zip}
- {country}
- {interval} - returns the specified period before membership expiration that will trigger the expiration email. This is only available in the Expiration Notify Email.
- {price} - returns the membership price
- {coupon} - returns the coupon code used (not available for the Renewal, Upgrade and New Extra Added emails)
- {payment} - returns the payment gateway used
- {membership-custom-field} - returns the membership custom fields
Two new placeholders for the Subscribe and Approved emails (also applies to the Administrator Email) have been added:
- {transaction_id} - returns the id of the current transaction
- {transaction_hash} - returns the order number generated by the payment gateway used by the user (this is only available for the PayPal, Authorize plugins)
Custom fields placeholders
You can also add placeholders for your custom fields in the Thank You Message, Subscriber's Email and in the Administrator's Email. The syntax looks like this:
{fieldname}.
Administrator's Email
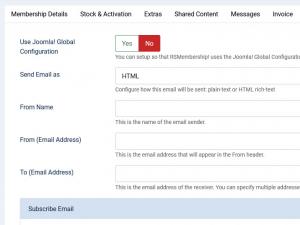
In this area you are able to set general, header information for the configurable emails located under the Administrator's Email:
- Use Joomla! Global Configuration: You can setup so that RSMembership! uses Joomla! Global Configuration settings in order to prefill the "From Name" and "From Email Adress" when sending the emails
- Send Email as: Plain text/HTML
- From Name: The name of the email sender
- From Email Address: The email address of the sender
- To (Email Address): The email address(es) of the receiver (you can specify multiple addresses, separated by comma).
In this area you can set up the body and subject of various Administrator emails:
- Subscribe: the email is sent when a new subscription is performed
- Approved: the email is generated when the membership transaction has been approved
- Denied: email sent to the administrator if a transaction was denied.
- Renewal: this is triggered when a membership has been renewed
- Upgrade: when a membership upgrade took place
- New extra Added: when an extra option has been added to a membership
- Expiration notify: when a membership is about to expire based on the configured X number of days from the "Subscriber's Email" (these share the same configurable X number of days field).
Advanced Customization
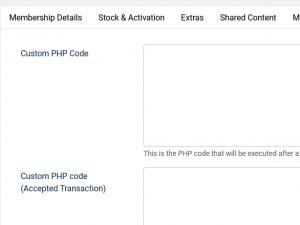
Custom PHP codeHere you can place custom scripts in order to achieve that little "extra" that you need. The script will be executed after a subscription has been made and email (applying email) was send (this includes membership upgrades, extras or renewals).
Accepted transaction
Here you can add standard PHP / MySQL code that will be executed when a transaction has been approved (this includes membership upgrades or renewals).
The following variables can be used within this areas:
- $membership - containing the membership's details
- $user_data - containing the user's details
- $user_email - containing the user's email
- $transaction - containing the transaction's details
18 persons found this article helpful.

